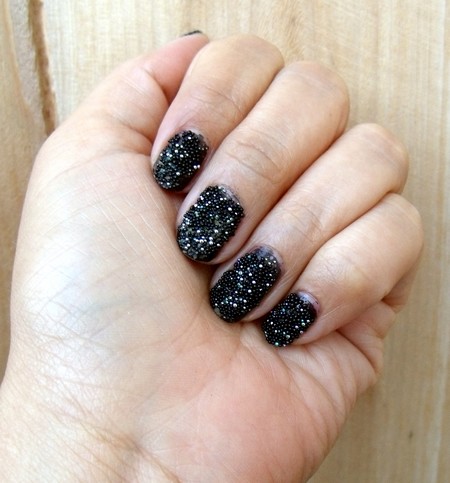
Ciate Caviar Manicure
I have to admit this was completely an impulse purchase, didn’t wait to see reviews or give it a test drive, I saw, I bought and I loved! This is the new Ciate Caviar Manicure.

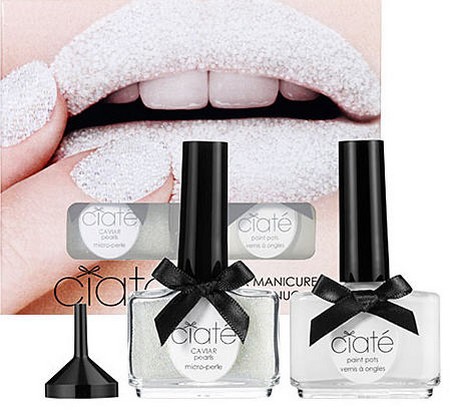

Created in London, this one-of-a-kind nail art innovation brings avant-garde catwalk nail styling to your fingertips. Featuring pearlescent beads for a 3-D effect, this kit includes everything you need to express yourself with your hands and become an instant nail connoisseur.
I couldn’t wait to try the polish, and so far I’m very happy with the results. It’s easy to put on, first step is the base coat, one coat of the nail polish and the fun starts with the second coat. One nail at a time, put on the second coat and carefully pour the beads on top of the nail, similar to how you would do glittering. The beads need to be gently patted down and once you’re done with all your nails, you will need to let them dry for 15 – 20 minutes. As an added protection for the beads I added a very thin top coat to the tips of my nails.
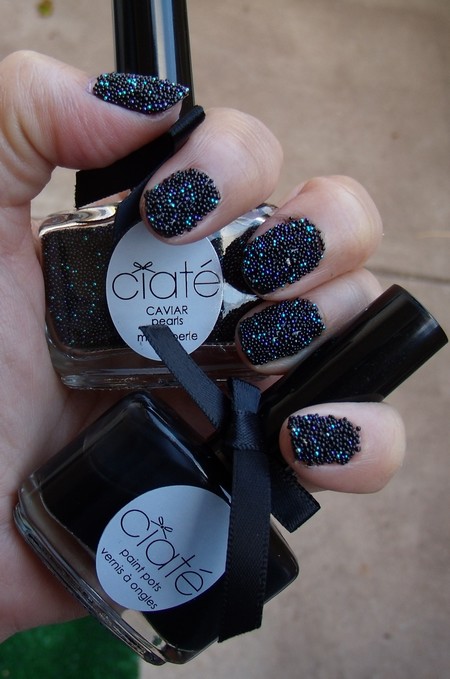
As I mentioned before, when I bought Ciate the Sephora site had no customer reviews, since then this product has been having mixed reviews, people either love it or hate it. And since the polish costs $25, when people hate it, they really hate it! The biggest complaint is that the beads fall off very easily, at least in my case I haven’t noticed that problem and I haven’t been able to stop touching my beads. The thing to be careful while adding the beads is to have a uniform layer of them, avoid small mounds that won’t adhere properly to the polish.
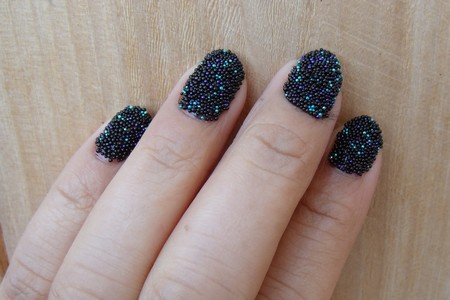
The beads can feel weird on the nail, like they’re thicker and so far the only thing I’ve done differently is wash the dishes using gloves, other than that it’s been business as usual with my nails…..except I’m showing them off with everyone I meet.
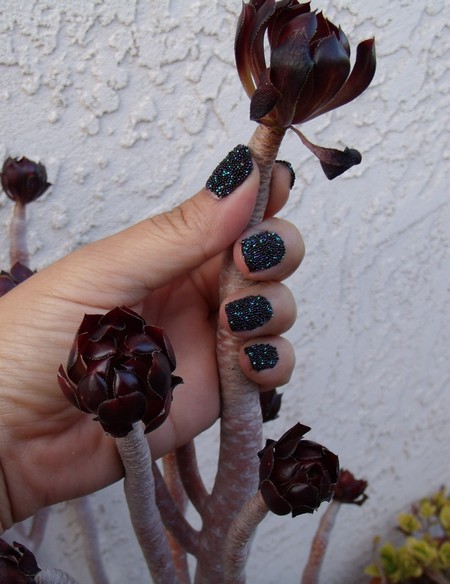
I’ll be posting an update 3 days from now to let you know how my manicure is looking. In the meantime…here are a few more pics of my Caviar Manicure.
~ UPDATE ~
The pic below was taken 72 hours after I put on the caviar manicure, as you can see several of the micro-beads had fallen off. I took the pic Saturday afternoon and was going out for the evening, so all I did was add color to the spaces using a toothpick dipped in Ciate nail polish and that gave it a uniform look again. I did not attempt to re-attach more beads though.
Even though I did try to be careful with my nails, I wasn’t paranoid about them. When I finally took them off I did notice some damage to my nails, so I let them rest for a day and applied moisturizing oil on them. Here are a few additional tips:
- Add at least two coats of a base coat to protect your nails.
- When you apply the coat of micro-beads, make sure you pat down gently but firmly and create a uniform layer
- Give yourself time to do nothing after the manicure so the nails dry (watch TV, read or take a cat nap)
- When it’s time to take them off, press a cotton ball soaked with nail polish remover on top of the nail for several seconds before removing the beads, this will help the nail polish below the beads soften and will be easier to remove. Doing it this way will also cause less damage to your nails.
One more thing, be prepared to have your nails touched by people. They can’t help themselves! It’s human nature to see something different and want to touch it. Even though the Caviar Manicure is higher maintenance than what I’m used to, I will definitely be using it for my weekends!
Thank You very much for your comments, it always makes our day to know people are reading us!